Hey there! I’m a supplier of solar connectors, and I often get asked how to connect a solar connector to a battery. It’s a crucial step in setting up a solar power system, and I’m here to walk you through it in a simple and straightforward way. Solar Connector
Understanding the Basics
Before we dive into the connection process, let’s quickly go over what a solar connector and a battery are. A solar connector is a device that allows you to link your solar panels to other components in your solar power setup, like batteries or charge controllers. It’s designed to handle the electrical current coming from the solar panels safely and efficiently.
On the other hand, a battery stores the energy generated by the solar panels. It’s like a big energy bank that you can draw from when the sun isn’t shining. There are different types of batteries for solar systems, such as lead – acid, lithium – ion, and nickel – cadmium, but the connection process is somewhat similar for most of them.
What You’ll Need
First off, gather all the necessary tools and materials. You’ll need:
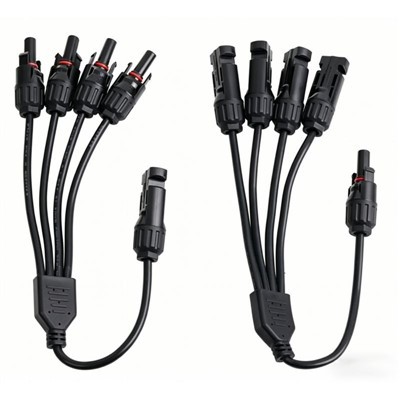
- A solar connector: Make sure it’s compatible with your solar panels and the battery. There are different types of solar connectors, like MC4 connectors, which are super common.
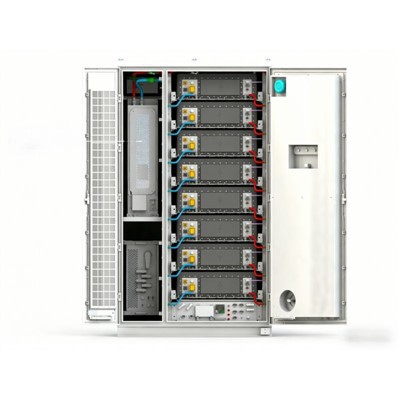
- A battery: Choose the right battery for your solar system based on your energy needs.
- A charge controller: This device regulates the voltage and current going into the battery, preventing over – charging.
- Some electrical wires: The gauge of the wire depends on the current your solar system will carry. Thicker wires are needed for higher currents.
- A pair of wire strippers: To expose the wire for connection.
- A screwdriver: If your connectors or battery terminals require screwing.
Step – by – Step Connection Process
Step 1: Prepare the Wires
Start by cutting the electrical wires to the appropriate length. You want them to reach from the solar panels to the battery without being too long or too short. Then, use the wire strippers to remove about half an inch to an inch of the insulation from the ends of the wires. Be careful not to cut the actual wire inside.
Step 2: Connect the Solar Connector to the Solar Panel
Most solar panels come with pre – installed solar connectors. If yours does, you can skip this step. If not, you’ll need to attach the solar connector to the wires coming from the solar panel. There are usually two wires, a positive and a negative. Match the positive wire from the panel to the positive terminal on the solar connector and the negative wire to the negative terminal. You might need to use a screwdriver to secure the connection if it’s a screw – type connector.
Step 3: Connect the Solar Connector to the Charge Controller
The charge controller is an important part of the system. It helps protect your battery from over – charging. Connect the solar connector to the input terminals of the charge controller. Again, make sure to match the positive and negative wires correctly. The charge controller will have labels indicating which terminal is positive and which is negative.
Step 4: Connect the Charge Controller to the Battery
Now, it’s time to connect the charge controller to the battery. Take the output wires from the charge controller and connect them to the battery terminals. The positive wire from the charge controller should go to the positive terminal of the battery, and the negative wire to the negative terminal. Double – check the connections to make sure they’re tight and secure.
Step 5: Test the Connection
Once you’ve made all the connections, it’s a good idea to test the system. Turn on the charge controller and check if there’s any voltage reading on the controller’s display. If there is, it means the solar panels are generating electricity and the connection is working. You can also use a multimeter to measure the voltage across the battery terminals to make sure it’s charging properly.
Common Mistakes to Avoid
- Wrong Polarity: This is a big one. Connecting the positive and negative wires incorrectly can damage your battery, charge controller, or even cause a short – circuit. Always double – check the polarity before making any connections.
- Loose Connections: Loose connections can lead to poor electrical conductivity and even overheating. Make sure all the connections are tight and secure.
- Using the Wrong Gauge of Wire: If you use a wire that’s too thin for the current your system is carrying, it can overheat and cause a fire. Always use the right gauge of wire for your solar system.
Why Choose Our Solar Connectors
As a solar connector supplier, I can tell you that our connectors are top – notch. They’re made from high – quality materials that can withstand harsh weather conditions, like extreme heat, cold, and moisture. Our connectors are also designed for easy installation, so you won’t have to struggle with complicated wiring.
We offer a wide range of solar connectors to meet different needs. Whether you’re setting up a small residential solar system or a large commercial one, we’ve got the right connector for you. And our prices are competitive, so you can get a great product without breaking the bank.
Let’s Connect
If you’re in the market for solar connectors or have any questions about connecting them to your battery, don’t hesitate to reach out. We’re here to help you every step of the way. Whether you’re a DIY enthusiast or a professional installer, we can provide you with the support and products you need.
Solar DC Cable Contact us to start a conversation about your solar power project. We’re excited to work with you and help you harness the power of the sun!
References
- "Solar Power Systems Handbook" by John Wiles
- "Battery Technology for Renewable Energy Storage" by Mark Brown
Tianjin Xilingke New Energy Technology Co., Ltd.
As one of the most professional solar connector manufacturers and suppliers in China, we’re featured by quality products and low price. Please rest assured to wholesale durable solar connector made in China here from our factory. For quotation, contact us now.
Address: Suite 2601, Tower B, Wanghai International, Haihe East Road, Hebei District, Tianjin, China.
E-mail: robin@sinelinkev.com
WebSite: https://www.sinelinkenergy.com/